


ZStack Cloud Platform
Single Server, Free Trial for One Year

Comprehensive product documentation and tools

Upholding the value of Customer First and the mission of Serving Customer, ZStack is dedicated to providing secure and stable services for customers.

To educate ZStack partners and interested individuals about cloud computing and to cultivate cloud computing talent.

ZStack provides innovative cloud infrastructure for ten major industries

The report provides three major
solutions and customer case studies for transitioning from VMware to ZStack.
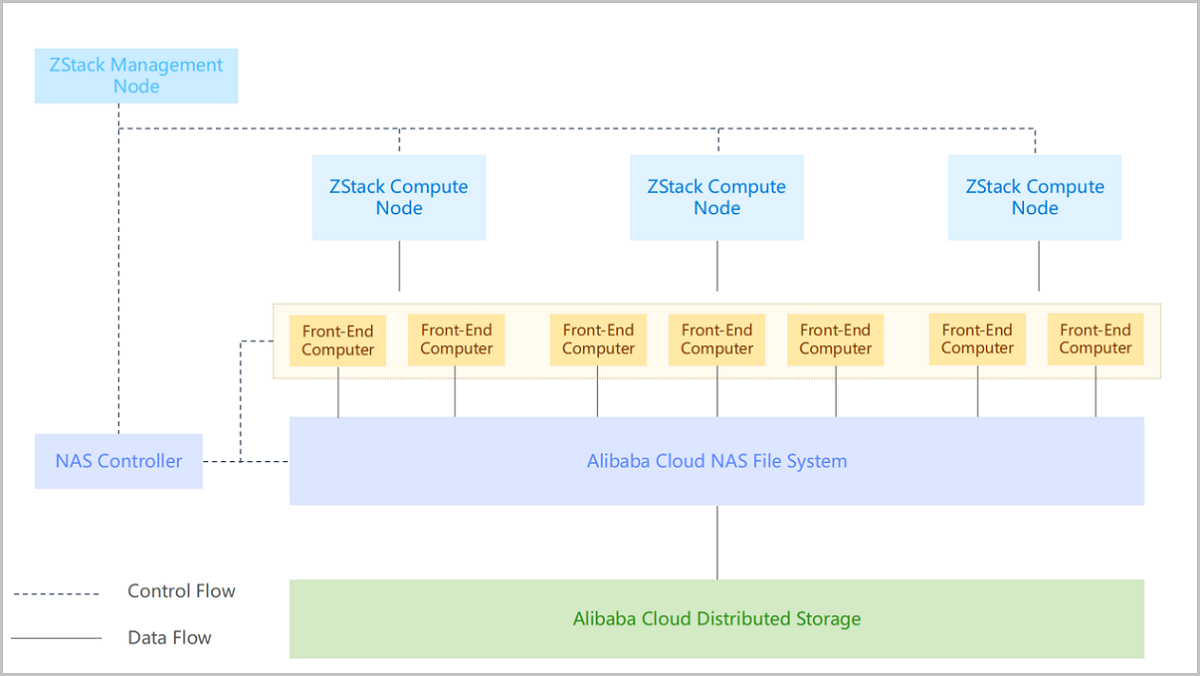
ZStack Cloud seamlessly integrates Alibaba Cloud NAS, restores the Alibaba Cloud centralized storage to distributed storage, and loads it to ZStack CloudPrivate Cloud as a primary storage type, AliyunNAS, for VM instances,.
A AliyunNAS primary storage works with an ImageStore image storage.
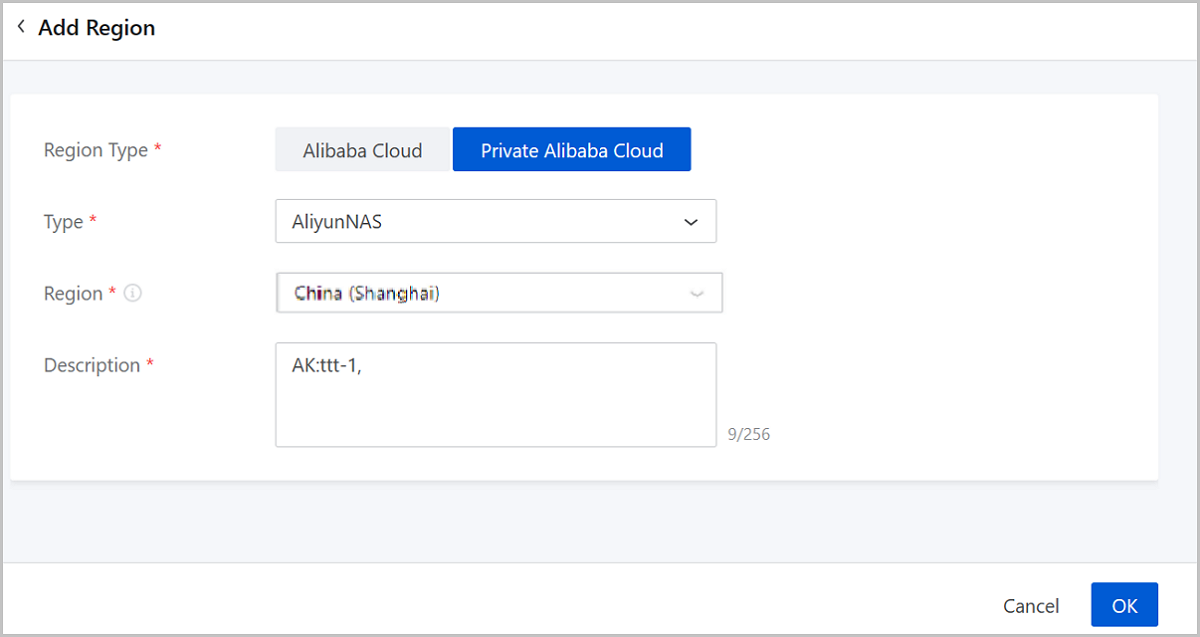
The procedures of deploying an AliyunNAS primary storage are explained in details as follows:
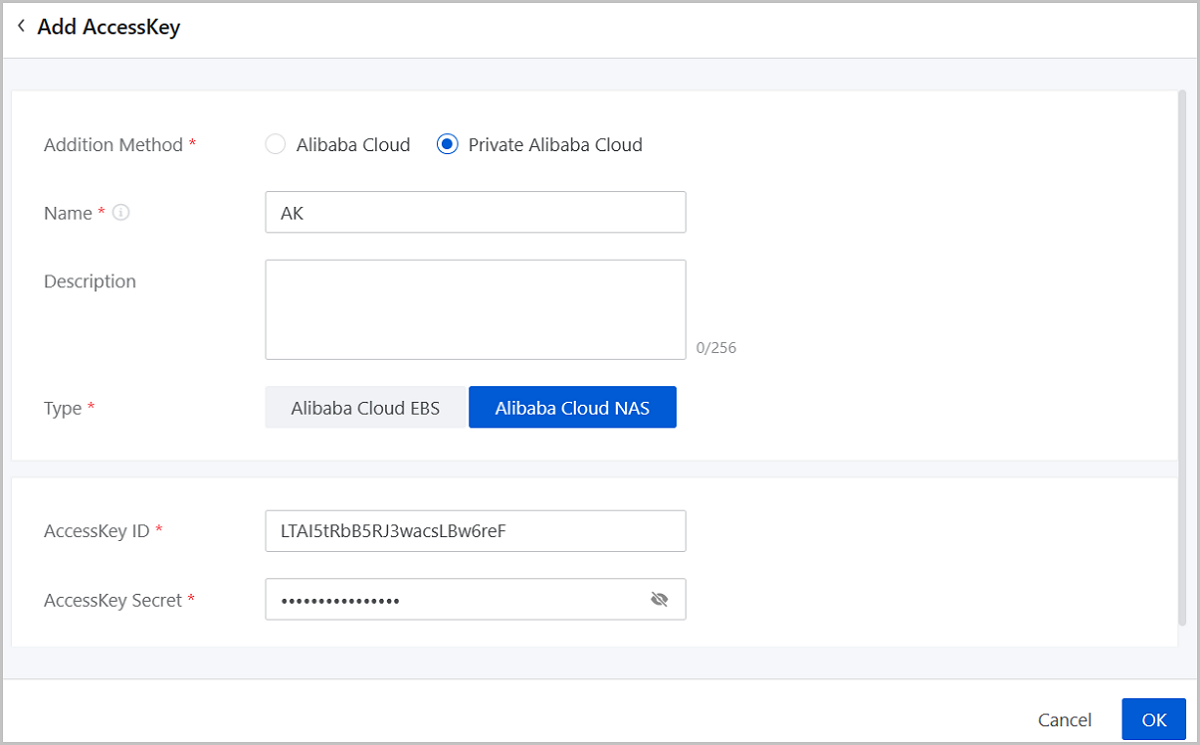
On the main menu of ZStack Cloud Hybrid Cloud Management, choose . On the AccessKey Management page, click Add AccessKey. Then, the Add AccessKey page is displayed.
 Note:
Note: After you add the Private Alibaba Cloud AccessKey and corresponding regions, the NAS file system and related resources are automatically synchronized to local. You do not need to click Sync Data manually.
On the main menu of ZStack Cloud Hybrid Cloud Management, choose . On the Permission Group page, click Create Permission Group. Then, the Create Permission Group page is displayed.
Note: You can add only a classic network permission group.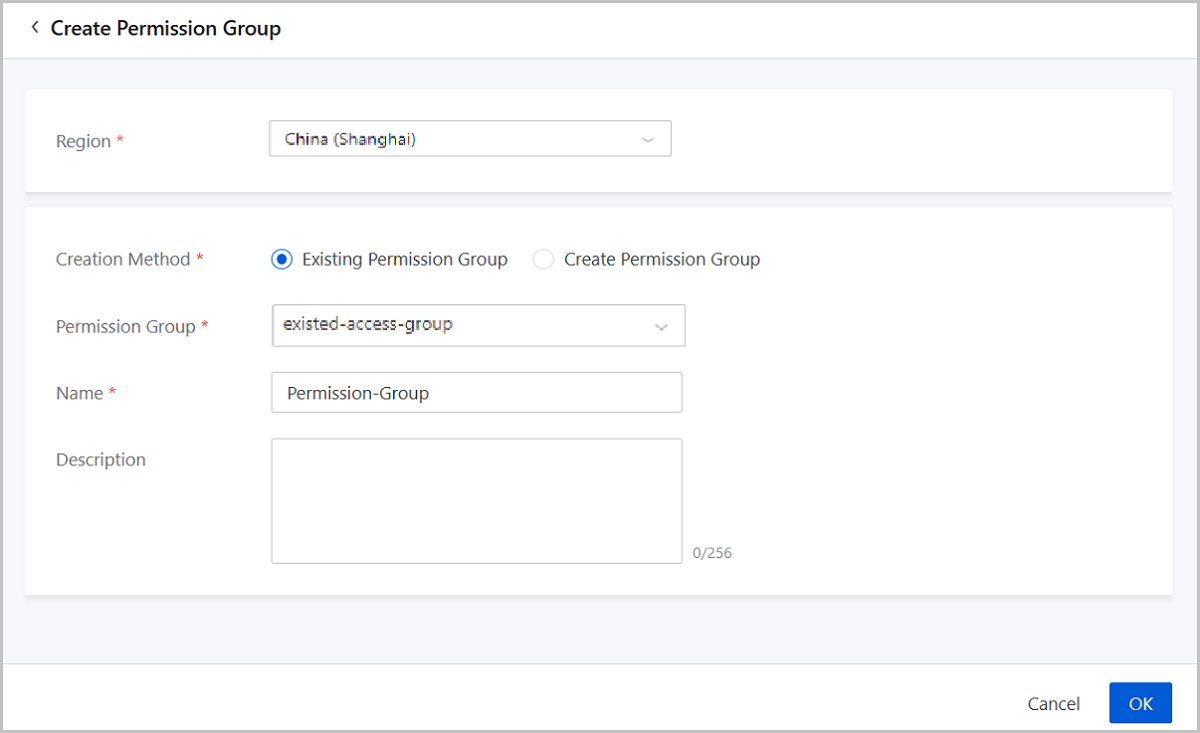 Note: You can create only a classic network permission group.
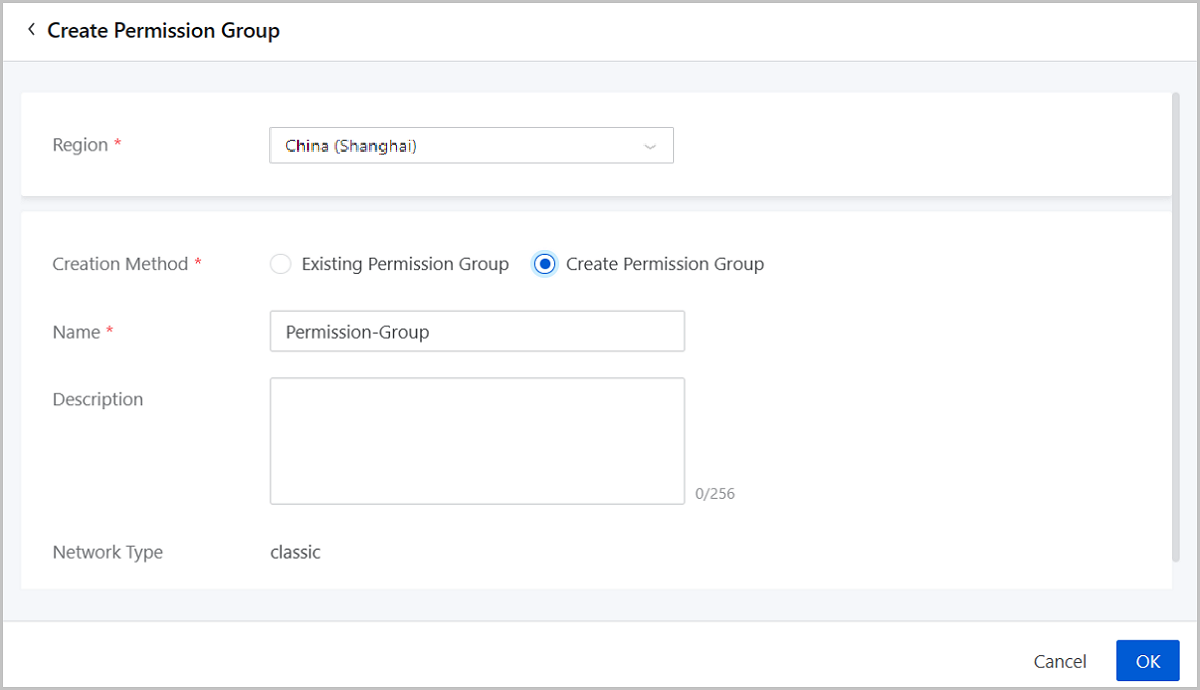
On the Permission Group page, click the name of a permission group. On the displayed permission group details page, choose . Then, the Create Permission Group Rule page is displayed.
Note: If you add more than one permission group rules to an authorization object, the rule with the highest priority takes effect.Note: On the Primary Storage page, you can manage the added AliyunNAS primary storage, such as enabling, disabling, reconnecting, deleting, entering maintenance the primary storage, or attaching/detaching the primary storage to/from a cluster. On the details page of the primary storage, you can view visualized monitoring, alarm, and audit information of the primary storage, and centrally manage VM instances and volumes created on the primary storage.
Now, you have successfully deployed an AliyunNAS primary storage.


