


ZStack Cloud Platform
Single Server, Free Trial for One Year

Comprehensive product documentation and tools

Upholding the value of Customer First and the mission of Serving Customer, ZStack is dedicated to providing secure and stable services for customers.

To educate ZStack partners and interested individuals about cloud computing and to cultivate cloud computing talent.

ZStack provides innovative cloud infrastructure for ten major industries

The report provides three major
solutions and customer case studies for transitioning from VMware to ZStack.
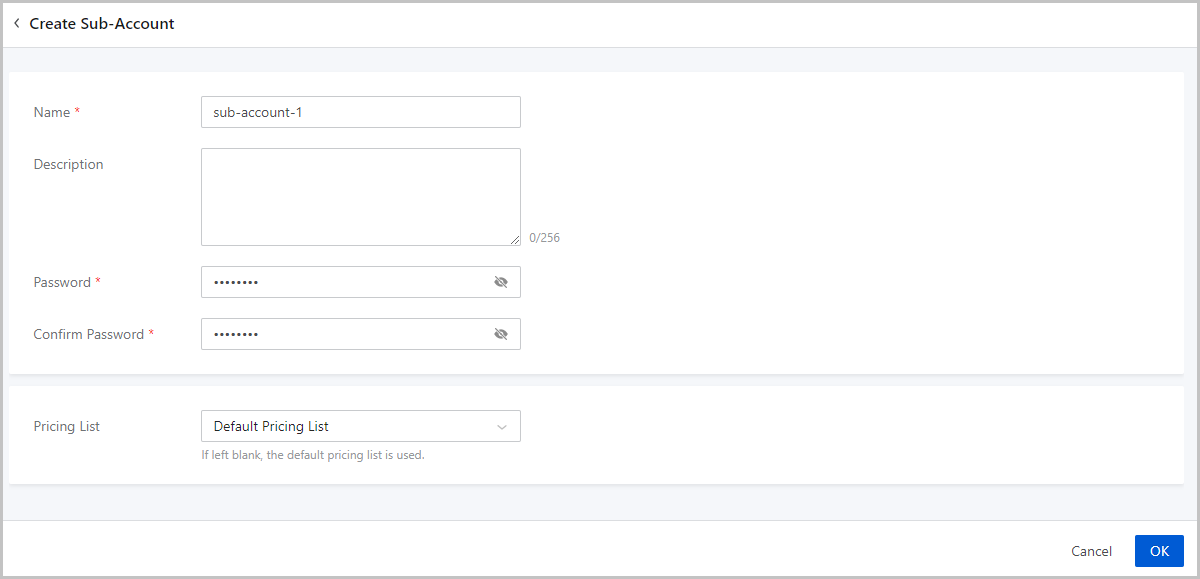
On the main menu of ZStack Cloud, choose . On the Sub-Account page, click Create Sub-Account. Then, the Create Sub-Account page is displayed.
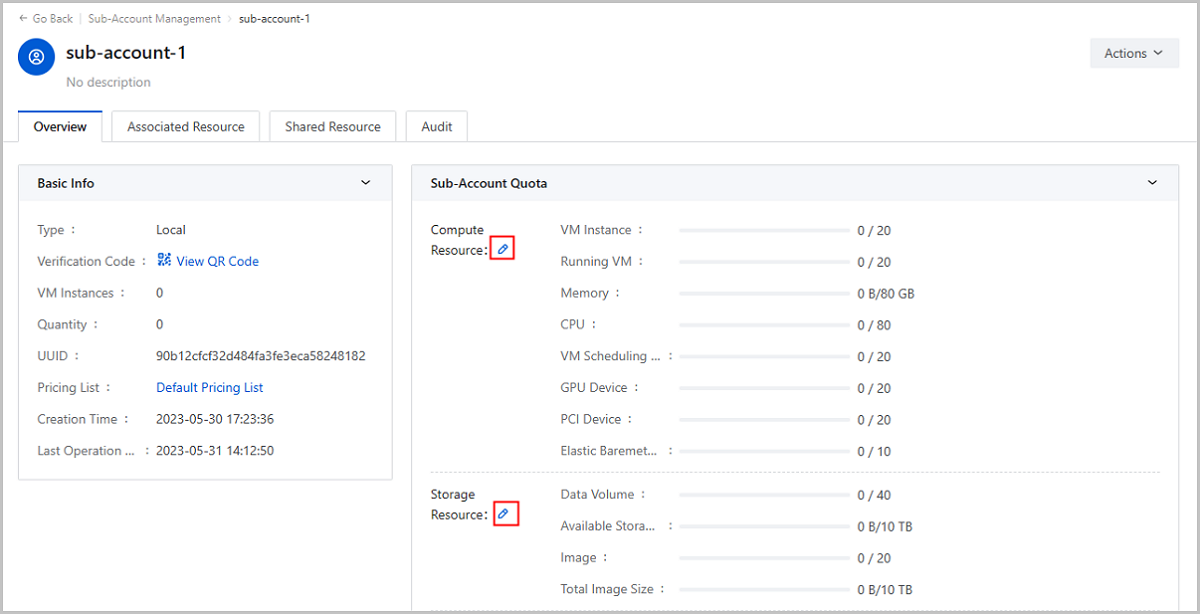
The Cloud assigns default resource quotas for each local sub-account. You can customize the quotas to fit your needs. To modify the quotas, navigate to the Sub-Account page and click on a sub-account to access its details page. Under the Sub-Account Quota section, you can see the resource quotas, or the upper resource limit, available to the sub-account. Select a resource type and adjust the quota as needed.
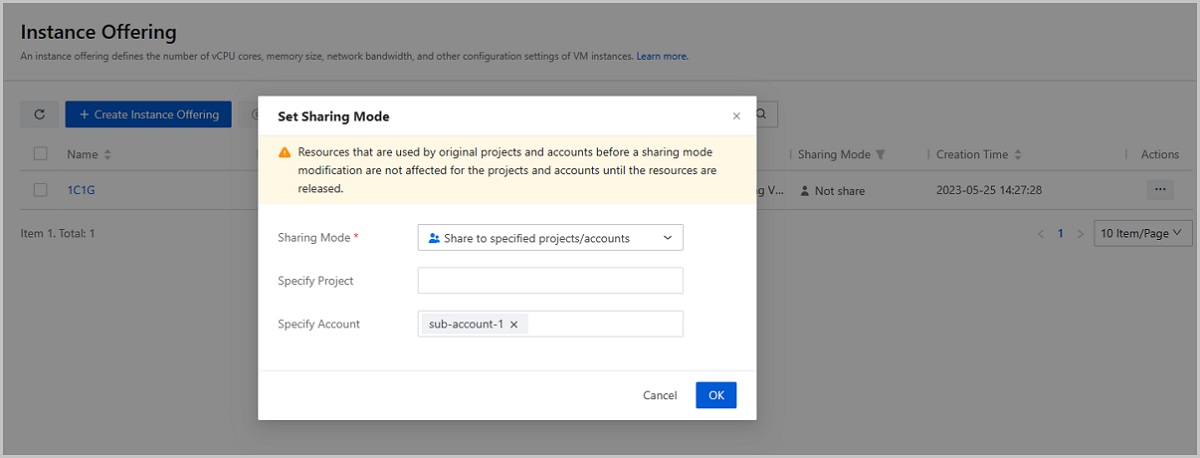
By default, the resources created by the admin, including instance offerings, images, and networks, are not shared with sub-accounts. For a sub-account to create a VM instance, the admin must first share these resources with the sub-account. Here is an example of how to share an instance offering, and the same steps can be followed for other resources.
On the main menu of ZStack Cloud, choose . On the Instance Offering page, locate an instance offering and choose . Then select the target local sub-account and click OK. You will be able to see this instance offering when you create a VM instance with the local sub-account.
 Note: The admin can create various resources and selectively share them with different sub-accounts. This strategy enables efficient resource isolation among multiple accounts.
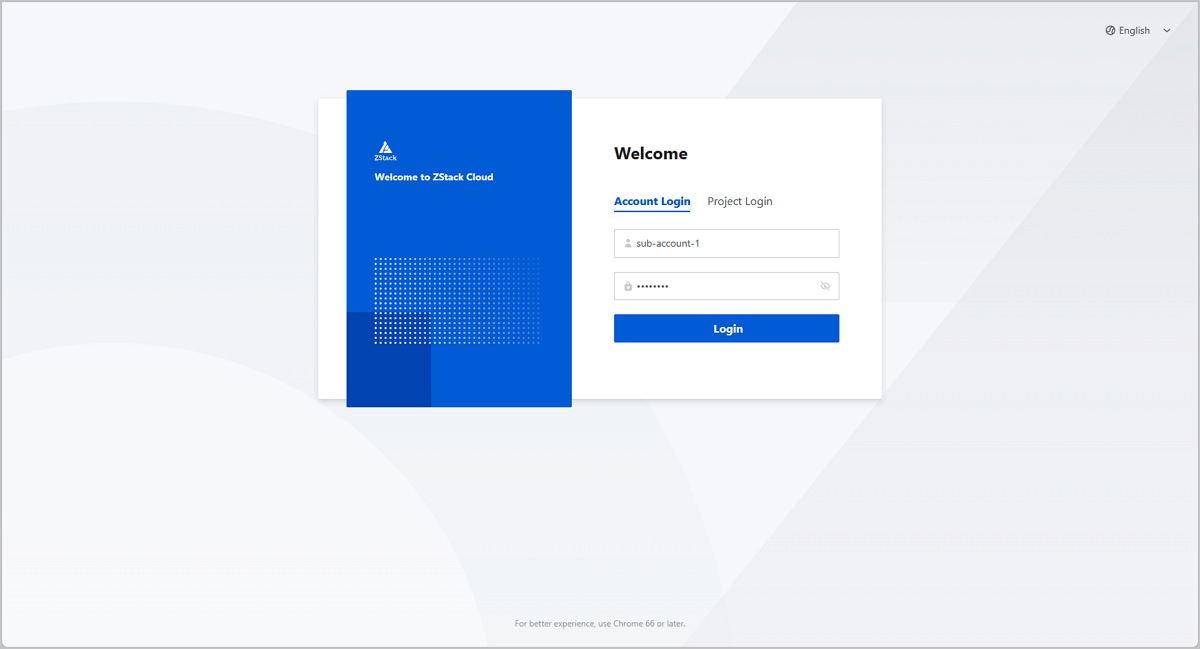
Click the Logout button in the upper right corner of the browser to log out of the admin account. Then, log in to the Cloud using the newly created local sub-account.
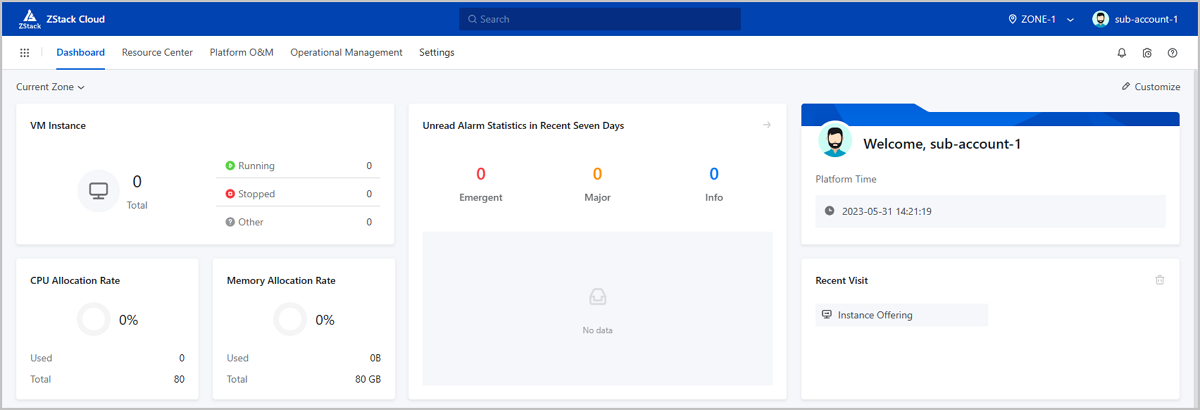
Upon logging in with the sub-account, the dashboard will display the available resource information for this account. This information is in line with the quotas managed by the admin.
 Note: When you use a sub-account to create a VM instance, you need to either use the admin account to share relevant resources including instance offerings, images, and networks, or create/upload new resources using the sub-account.
ZStack Cloud supports seamless access to OIDC third-party authentication systems, allowing OIDC sub-accounts to log in to the Cloud without the password and manage cloud resources.
The Cloud assigns default resource quotas for each OIDC sub-account. You can customize the quotas to fit your needs. To modify the quotas, navigate to the Sub-Account page and click on a sub-account to access its details page. Under the Sub-Account Quota section, you can see the resource quotas, or the upper resource limit, available to the sub-account. Select a resource type and adjust the quota as needed.
Once an OIDC authentication server is added to ZStack Cloud, a Password-free Login URL will be generated. The administrator of the business application system can configure this URL into the application system, such as a unified portal website. OIDC sub-accounts can then click on the corresponding application icon to log in to the Cloud password-freely.


