


ZStack Cloud Platform
Single Server, Free Trial for One Year

Comprehensive product documentation and tools

Upholding the value of Customer First and the mission of Serving Customer, ZStack is dedicated to providing secure and stable services for customers.

To educate ZStack partners and interested individuals about cloud computing and to cultivate cloud computing talent.

ZStack provides innovative cloud infrastructure for ten major industries

The report provides three major
solutions and customer case studies for transitioning from VMware to ZStack.
Console proxy allows you to log in to a VM instance by using the IP address of a proxy. You can view the information about the proxy used to launch your VM console.
An AccessKey pair is a security credential that one party authorizes another party to call API operations and access its resources in the Cloud. AccessKey pairs shall be kept confidential.
A local AccessKey pair consists of an AccessKey ID and AccessKey secret. It is a security credential that the Cloud authorizes a third-party user to call API operations and access its cloud resources. AccessKey pairs shall be kept confidential. An AccessKey pair has the full permissions of its creator.
A third-party AccessKey pair consists of an AccessKey ID and AccessKey secret. It is a security credential that a third-party user authorizes the Cloud to call API operations and access its cloud resources. AccessKey pairs shall be kept confidential.
 Note: Note: You can enable the IP allowlist and blocklist feature as needed. To configure it, follow these steps:
Go to . Set IP Allowlist/Blocklist to true. By default, this setting is set to false.
Note: On the IP allowlist and blocklist page, you can choose to add an IP allowlist or an IP allowlist. The process is the same for both. The following section introduces adding an IP blocklist.
On the main menu of ZStack Cloud, choose . On the IP Allowlist/Blocklist page, click Add IP Blocklist. Then, the Add IP Blocklist page is displayed.
Note: 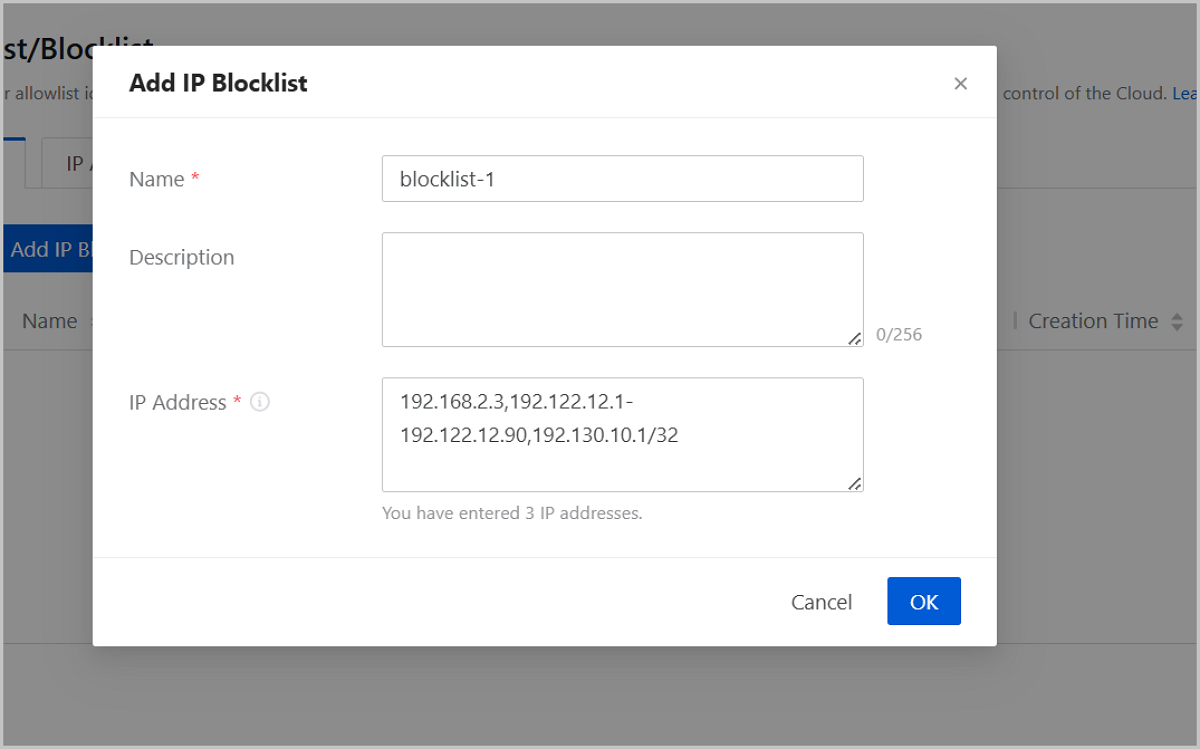
| Action | Description |
|---|---|
| Add IP Allowlist/Blocklist | Add a new IP allowlist or blocklist.Note: Once added, the blocklist or allowlist takes effect immediately. IP addresses in the list will be denied or allowed access to the platform. Proceed with caution. |
| Edit Name and Description | Edit the name or description of an existing IP allowlist or blocklist. |
| Delete IP Allowlist/Blocklist | Delete the selected IP allowlist or blocklist.Note: Once deleted, the allowlist or blocklist will no longer be effective, and there will be no IP restrictions for logging into the platform. Proceed with caution. |


