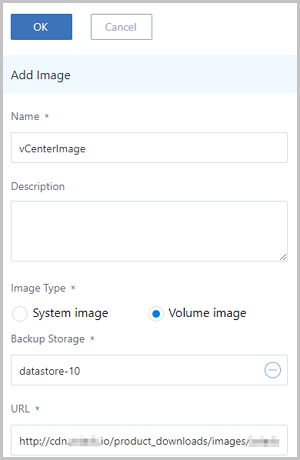
In ZStack, you can add a local image of the VMDK format to a vCenter. Then, you can synchronize the vCenter image between the local client and the remote client by synchronizing data. Both system images and volume images can be added.
The following part describes how to add a vCenter image in ZStack.
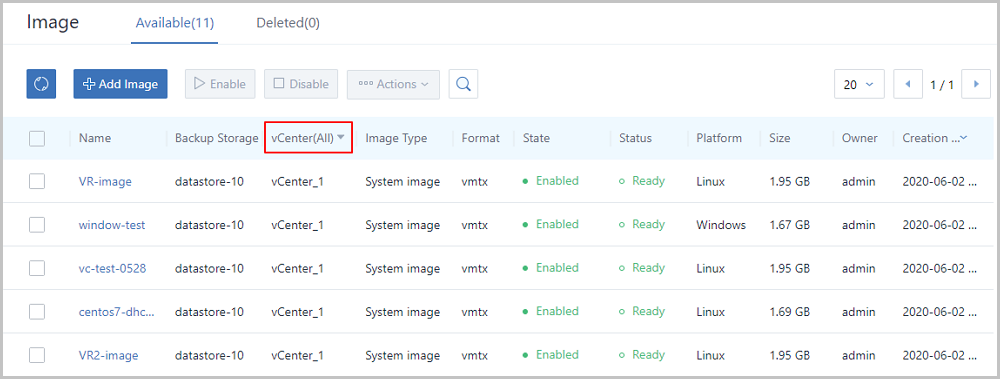
 Note: ZStack allows you to manage resources of multiple vCenters. You can view resources of all vCenters or a vCenter by clicking the vCenter drop-down arrow.Note: The name of the vCenter image cannot be the same as that of the vCenter VM instance.Note:
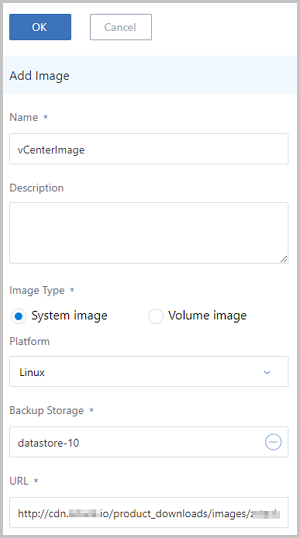
 Note:
Note: ZStack supports multi-tenant management in the managed vCenter. Normal accounts and project members can use the vCenter images shared by an administrator.
© 2023, Shanghai Yunzhou Information and Technology Ltd (云轴科技). All Rights Reserved.
Back to Top
Email Us
contact@zstack.ioEmail Us
contact@zstack.ioEmail Us
contact@zstack.ioThe download link is sent to your email address.
If you don't see it, check your spam folder, subscription folder, or AD folder. After receiving the email, click the URL to download the documentation.Thank you for using ZStack products and services.
Submit successfully.
We'll connect soon.Thank you for using ZStack products and services.

