To manage a vCenter via ZStack, you need to prepare a ZStack Private Cloud environment and a vCenter environment in advance.
You can either deploy a ZStack management node via an independent physical server, or deploy a ZStack management node via a VM instance of a vCenter cluster.
 Note: After you download the installation package, confirm the integrity of the file by using the MD5 checksum tool.
| Physical Server/vCenter VM | Parameter |
|---|---|
| ZStack management node |
|
| Network | Allocates network addresses and accesses vCenter servers smoothly |
Within the physical server or vCenter VM instance, use ZStack Custom ISO to install the operating system, and select ZStack Enterprise Management Node. After you complete installing and rebooting the operating system successfully, ZStack will be automatically installed. For more information, see the Installation and Deployment topic in the User Guide.
Note: For a vCenter VM instance, select the CentOS 5/6/7 (64-bit) operating system. Note:
Note: If you use a vCenter VM instance to install a ZStack management node, we recommend that you create a snapshot (excluding memories) at this time, and name this snapshot Initialization.
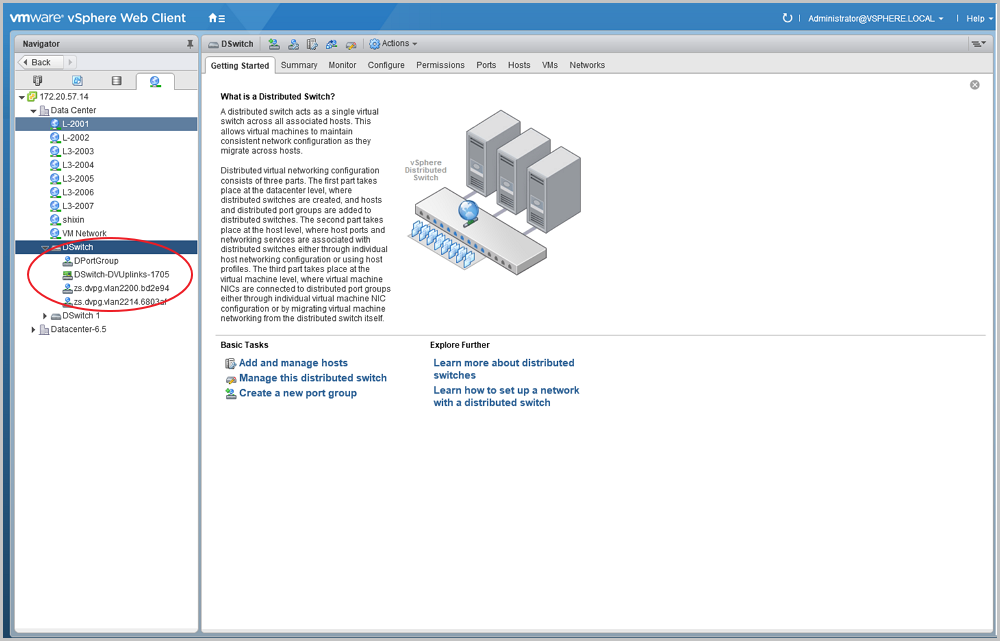
Note: Currently, Datastore Cluster is not supported.Only resources of the hosts added to a dvSwitch can be imported to ZStack. If you do not add a host to a dvSwitch, the associated resources cannot be imported to ZStack.
Note: ZStack can only take over VM networks rather than VMkernels or management networks.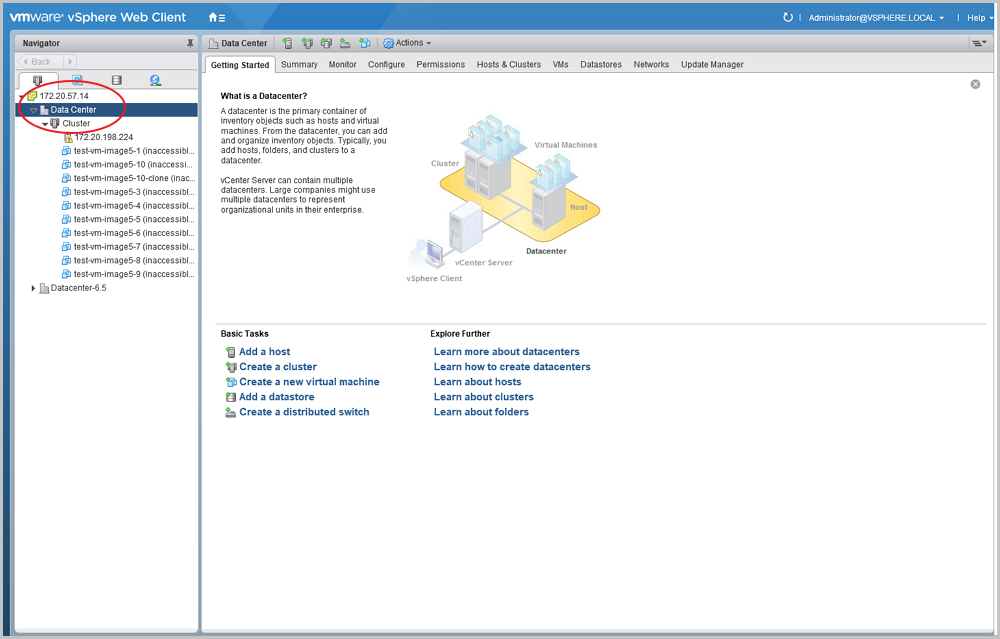

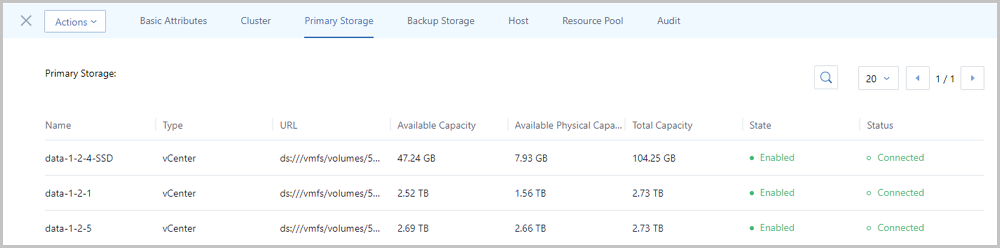
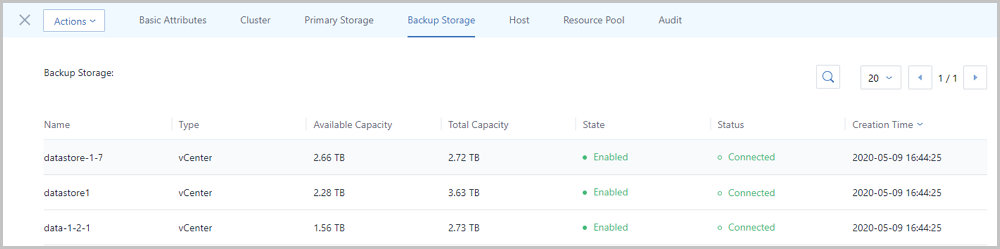
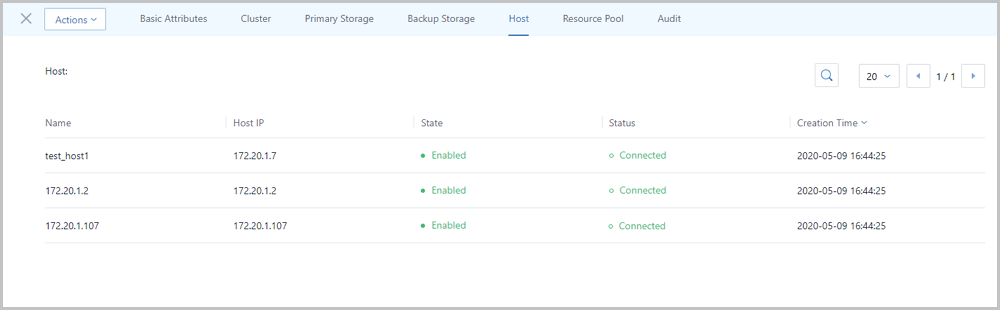
ZStack can manage vCenter basic resources, namely vCenter virtual resources, in a unified manner, including adding a vCenter, synchronizing data for a vCenter, and deleting a vCenter.
Only resources of the hosts added to a dvSwitch can be imported to ZStack. If you do not add a host to a dvSwitch, the associated resources cannot be imported to ZStack.
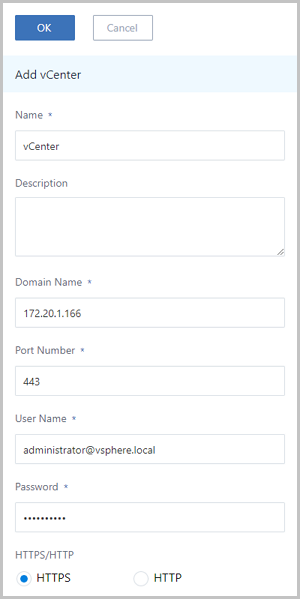
Note: ZStack can only take over VM networks rather than VMkernels or management networks.Next, we will introduce how to add a vCenter in ZStack.
 Note:
Note: 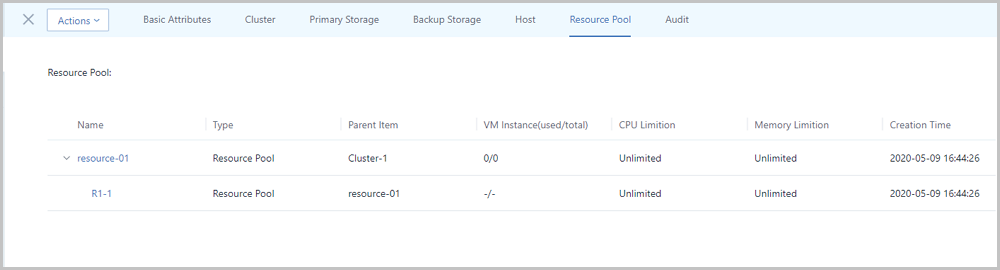 Note:
Note: For more information, see VMware Official Documentation.

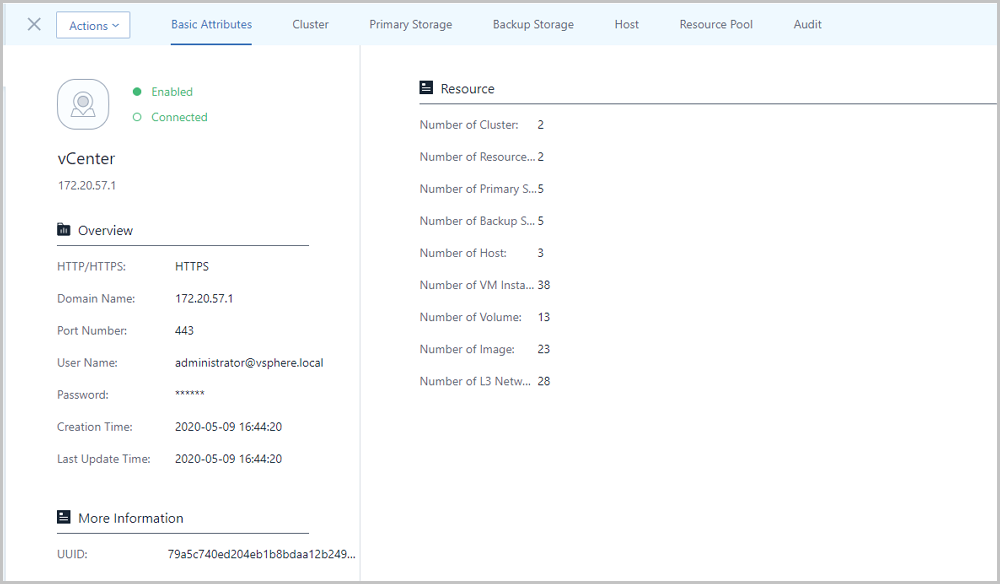
On the vCenter details page, click Actions to synchronize data or delete a vCenter.
Note: 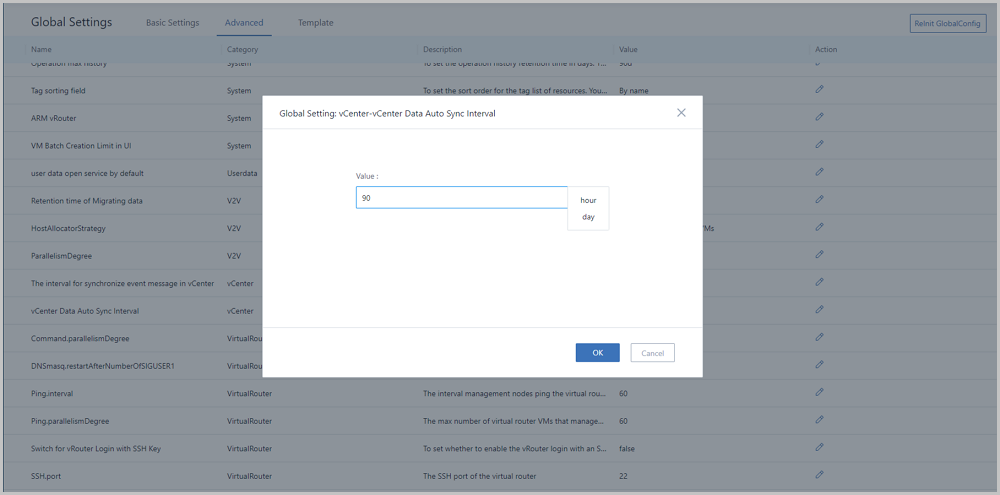
After you add a vCenter, the vCenter VM instances will be automatically synchronized to ZStack. In addition, you can create vCenter VM instances on your Cloud.
This topic describes how to create vCenter VM instances in ZStack.
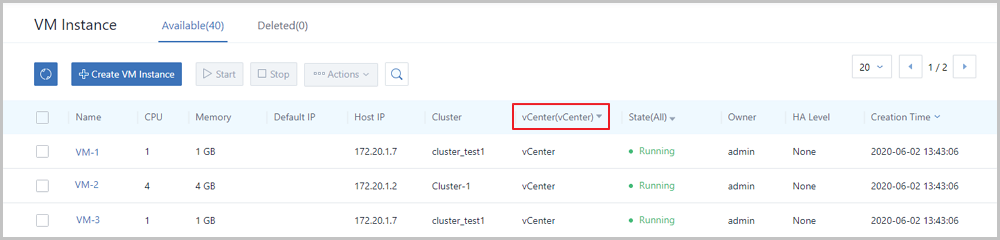 Note: ZStack allows you to manage resources of multiple vCenters. You can view resources of all vCenters or a vCenter by clicking the vCenter drop-down arrow.
Before you create a vCenter VM instance on your current Cloud, you need to set up a vCenter vRouter network or vCenter flat network in advance in ZStack. For more information, see Network.
Note: The vCenter VM name cannot be identical with the vCenter image name.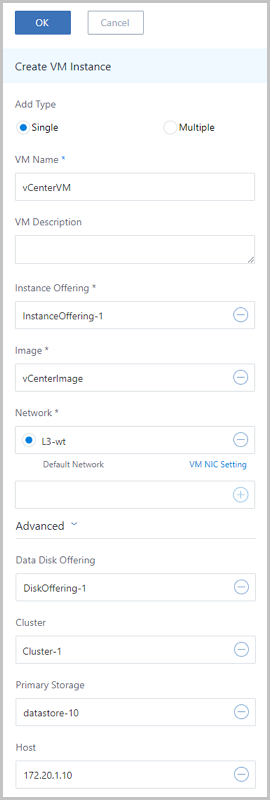 Note:
Note: ZStack supports multi-tenant management in the managed vCenter. Normal accounts and project members can perform operations on vCenter VM instances.
Note: If you want a vCenter VM instance with the NeverStop HA level to not be automatically rebooted, select Check the box will make NeverStop VM instance would not start automatically after stop. in the displayed Stop VM Instance dialog box.
Note: After ZStack takes over a vCenter, you cannot directly open the console of the running VM instances synchronized from the vCenter.
© 2023, Shanghai Yunzhou Information and Technology Ltd (云轴科技). All Rights Reserved.
Back to Top
Email Us
contact@zstack.ioEmail Us
contact@zstack.ioEmail Us
contact@zstack.ioThe download link is sent to your email address.
If you don't see it, check your spam folder, subscription folder, or AD folder. After receiving the email, click the URL to download the documentation.Thank you for using ZStack products and services.
Submit successfully.
We'll connect soon.Thank you for using ZStack products and services.